Saturday, December 19, 2020

Santa's Special Delivery Card

 Hello everyone,

I hope this post finds you well and safe.

I would like to show you one of my latest makes:


I so love to use  Santa's Sleigh from Cricut A Quilted Christmas Cartridge!


I made Poinsettia flowers using Heartfelt Creations Sparkling Poinsettia die and I added Impression Obsession Pine Branch diecuts and some berries.


I tucked in couple of the Tim Holtz Christmas Ephemera to finish my design.


I would like to enter my card into following challenges:

Bitten by the Bug 2 Die-Lirious Holiday Seasion  (I used Cricut for Santa's Sleigh)

Scrapping4FunChallenge #182 Christmas or Winter

Double D Challenge Poinsettia

Creatalicious Challenge #201 AG with option Christmas

Creative Crafters Challenge #35 AG

I hope you enjoyed this post.

Take care, stay safe and thanks for stopping by...


Thursday, November 19, 2020

Card Making Star at Spellbinders

 Hello all!

I am beyond thrilled to announce that I was one of the winners at Spellbinders Cardmaking Star Contest!


I won $300 shopping spree at Spellbinders (already spent it all this morning)

Take care all and stay safe out there!

Samra

Thursday, November 12, 2020

Vintage Santa Holiday Card

 Hello everyone,

I would like to share with you my latest make:


I created this card using traditional Christmas colors but went with bright and fresh look.


I used Spellbinders Fleur de Lis Rectangles and decorated them with gold liquid pearls.


Poinsettia is Heartfelt Creation Large Sparkling Poinsettia. I used Liquid Platinum embossing powder to heat emboss the flower. Pine branches are Impression Obsession Pine branch diecuts. I added a little seam binding ribbon bow on a vintage tag, tucked into the floral arrangement. 


I would like to enter my card into following challenges:


TFJB Challenge Celebrate (in bright red and green)

Inspired By..."Deer" Santa (I was inspired by Santa)


I hope you enjoyed this post.

Stay well and safe...


Saturday, November 7, 2020

Fancy Witch Hat Halloween Card

 Hello everyone!

I would like to show off my latest make:


I created the background by layering purple cardstock and gray cardstock, embossed with black texture paste. I love using this damask stencil!


The hat was cut using Cricut, then I decorated it with purple seam binding ribbon and black rose lace ribbon.


I added some black looped wire to finish off the hat decoration.


I also added this fancy looking corset-like detail to the card to finish my design.


I would like to enter my card into following challenges:


Two Old Bats Halloween Challenge - November


Try It On Tuesday Embossed ( I used texture paste to create embossed background)

Let's Craft and Create #165 AG


I hope you enjoyed this post.

Thank you for stopping by.

Stay safe out there....


Saturday, October 31, 2020

Elegant Floral Birthday Card in Gold and Pink

 Hello everyone,

I would like to show off my latest make:


I used Spellbinders dies to create this card. The sentiment is computer generate and die-cut with banner die.


I added a bunch of hand made flowers...


...and pink seam binding ribbon to finish my design.


I would like to enter my card into following challenges:


Krafty Chicks Challenge #531 for their 10th birthday

Creatalicious Challenge #198 Anything Goes

The Creative Crafters challenge #33 Anything Goes


I hope you enjoyed this short post.

Thank you for stopping by...


Thursday, October 15, 2020

Fancy Witch Boot Halloween Card

 Hello dear friends,

I hope this post finds you well and safe. I would like to share with you my latest make:


My dear blog friend Sara invited me to join the challenge she is hosting over at TFJB Challenge Blog and I could not pass that, especially it being a Halloween themed challenge.


I had fun making this fancy all blinged up Witch Boot in Purple, Orange and Green. You probably can't tell just by looking at the picture, but the black bottom part of the shue is black velvet. The picture does not give it justice how rich and fancy this Witch must be!


 I stamped TH Halloween sentiment on a piece of 13arts cardstock and heat embossed it in glitter red embossing powder. I added a lot of blind onto the Spellbinders Oval Frame.


Here is a closeup picture of the boot with all the bling, ruffles and glamour!

I would like to enter my card into following challenges:


I hope you enjoyed this post.
Thank you for stopping by, take care and stay safe.


Tuesday, October 13, 2020

Halloween Skull Card

 Hello everyone,

I hope this post finds you well and safe.

I would like to share with you one more Halloween card:


I used Spellbinders elegant embossing folder for the background and Spellbinders Fleur de Elegance die.


I stamped the skeleton skull three times and fussy cut the top hat from the first one, one of the eyes on the second and left the third for the base of the layers. This gives it nice dimension and spooky fun look.


I also fussy cut stamped Happy Halloween sentiment and added an elegant seam binding ribbon bow, and hand made roses.


Here is one more look at the finished card and a box that it comes with.

I would like to enter my card into following challenges:

Simon Says Stamp Monday Challenge: Spooky!

Try It On Tuesday Halloween Time

Two Old Bats Halloween Challenge (brand new Halloween ONLY theme challenge TOTALLY MY KIND OF THING!!!)

Well, I hope you enjoyed this post.

Thank you for stopping by, take care and stay safe out there...


UPDATE: 11/1/2020 My card was in Top 3 at Two Old Bats Halloween Challenge :)


Tuesday, September 29, 2020

 Haunted Castle Halloween Card


Hello everyone!

I hope this post finds you well and safe. It has been a while since my last post, but it doesn't mean I wasn't busy crafting. I just hadn't had a chance to post anything that I have made in last couple months.

I would like to share with you one of my Halloween creations:


I created the background using white cardstock, then I used a circle cutout to ink the moon, then covered moon with a circle to ink the rest of the paper in dark blue shades and then I used embossing ink through a stencil to create the starry night by heat embossing with golden embossing powder.


I used Cricut Happy Haunting and Teresa Collins Chic & Scary cartridge images to cut out all the elements for my scary scene.


I used Sue Wilson Camellia complete petals dies for my hand made black roses, and black seam binding ribbon for the elegant bow.

I would like to enter my card into following challenges:

 The Paper Girls Challenge #208 Pick 3 (I picked circle, flower and lots of layers)


Krafy Chicks Challenge #526 All Occasions 

Make My Monday #131 Use your scraps (Roses made using scraps)


I hope you enjoyed this post.
Have a fabulously safe day and thanks for stopping by...


UPDATE: 9/30/2020 I am thrilled to announce that I was one of the winners at Krafty Chicks Challenge #526 All Occasions! 


UPDATE: 10/19/2020 I am thrilled to announce that my Halloween card was a winner of Bitten By the Bug 2 Halloween Challenge!


Sunday, July 5, 2020

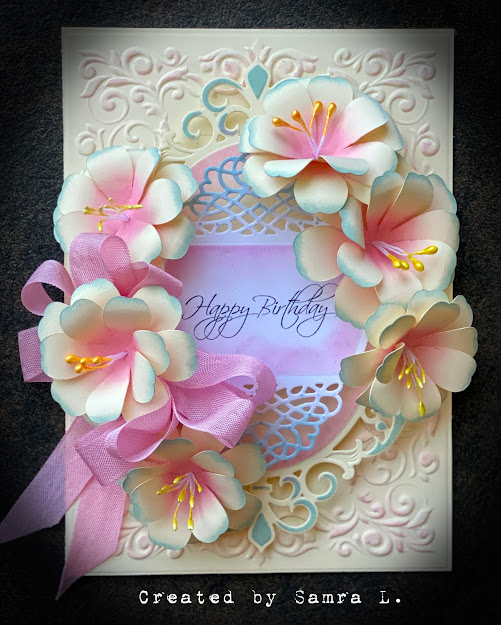
Elegant Floral Birthday Card

Hello all,

I would like to share with you my latest make:


For my base, I used a beige cardstock and embossed it with Spellbinders 3D embossing folder. Then I slightly inked the raised parts with pink ink. Next, I used Spellbinders Fleur de Elegance and A2 Tranquil Moments dies to create next two layers.


The sentiment was computer generated and after die cutting I used Distress Ins Speckled Egg and Pink to ink the diecut piece. I made flowers using Cricut Flower Shop image, pink and Speckled Egg inks and flower stamens.


I added pink seam binding ribbon bow to finish my card.


One more look at the card and box that it comes with...

I would like to enter my card into following challenges:

Creatalicious Challenge #190 Anything Goes with option Add Texture ( I added texture with embossing the background)


Tuesday, June 23, 2020

Fancy Flowers Card

Hello everyone,

I would like to share with you my latest make:


I created the background from water color paper, acrylic paints and texture paste and splash-like stencil.


I used Cricut to cut out flowers, ink them with distress inks and add flower stamens. Crinkle seam binding bow was hand died.


The sentiment was computer generated and cut into strip. I added some gem embellishments and a couple of fleur cut outs to finish the card.


One more look at the finished card and the box that it comes with...

I would like to enter my card into following challenges:


Make My Monday Challenge #125 Use Stencils I used stencil that looks like splashes to apply texture paste.

I hope you enjoyed this post.
Thank you for stopping by and stay safe...


Wednesday, June 10, 2020

Guest Designer at The Funkie Junkie Boutique Blog

Hello everyone,

I am thrilled that I was given the opportunity to  guest design for Funkie Junkie Boutique!
My guest appearance is for their current challenge with the theme Positively Pensive!
Here is the description: 
The challenge is to thoughtfully use a ballpoint pen on your project.
You can doodle, journal, sketch or trace an outline using any color ballpoint pen on your art.
Create a Vintage or Shaby Chic project with ink from a ballpoint pen and if it isn't obvious how it was used, make sure to tell us in your post!
And here is my inspiration contribution:


The way I used a ballpoint pen is to outline parts of the diamond shapes that were created with Finnabair Harlequin stencil and texture paste, doodling around the embossed edge of oval that mannequin was placed on, and some more at the corners of the stenciled background.


I added some hand made flowers that I covered with Gesso to give them that rustic look and a seam binding ribbon for this crinkled shabby bow.


I added a little hand rolled rose to this Prima Shabby Chic Mannequin.


Here is a closeup of the ballpoint outlines and doodling. In the background you can see another layer diecut that I embellished with pink liquid pearls.


Another look at the finished card and the box that it comes with.

I hope you will join this fun challenge at The Funkie Junkie Boutique Blog.

Thanks for stopping by and stay safe...